Happy Monday, guys! How was your weekend? I don’t know if you noticed but I’ve been sharing more blog tips/how-to content lately. I work in the digital comms-sphere so between my day job and my blog nights, it’s safe to say I spend a lot of time thinking about the Internet machine.
You could even go so far as to say that I’m addicted. But it’s a totally healthy addiction and I could quit at any time. Okay, the last part’s a complete lie. Remember the episode of Parks + Rec when Tom has the court order to give up screens? Yup, that’d be me. No shame in my Internet game.
About to drop some serious knowledge: If you live in DC and have a library card, you get free access to Lynda.com. GAME CHANGER!! Pretty much no excuse left to not improve your Adobe Creative skills.
I love working on the Interwebz because there’s virtually no end of things to learn, which gets my inner nerd pretty hyped up. Like, can’t-fall-asleep-because-I’m-making-a-list-of-tutorials-I-want-check-out-and-brainstorming-how-to-use-them-hyped-up. Do you get like that? I hope so!
I just really love using puns. And memes. And GIFs.
Which brings us to today’s topic: how to make a GIF.
I’ve dabbled with GIFs for both work and blog and personally, I’ve found Photoshop to be the easiest route. So let’s break this down step-by-step!

How to Make a Gif in Photoshop
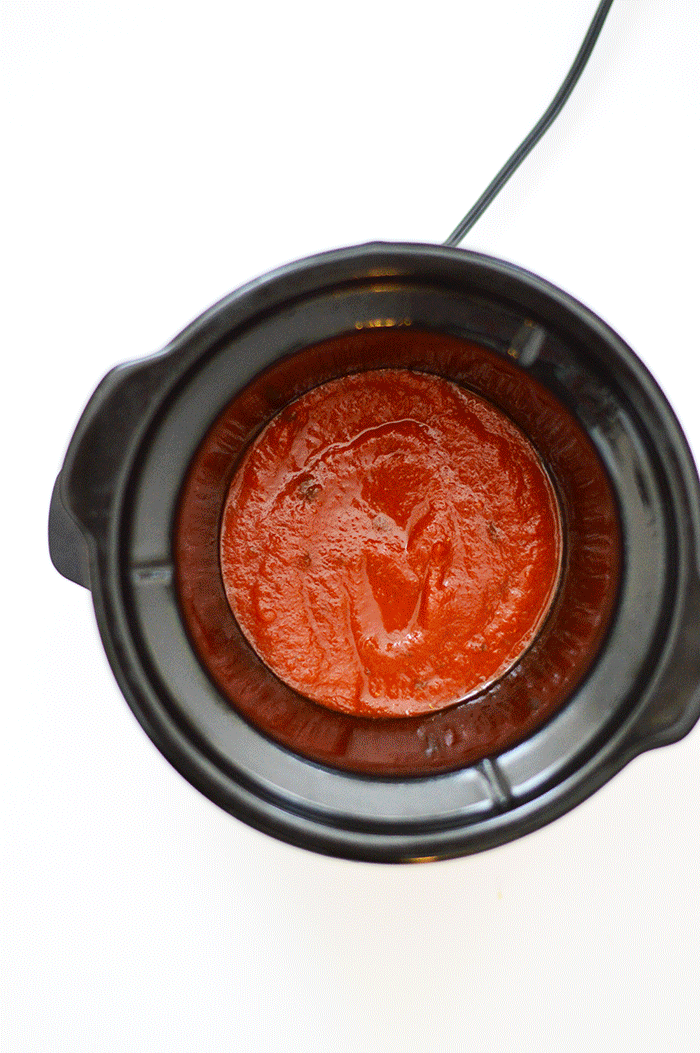
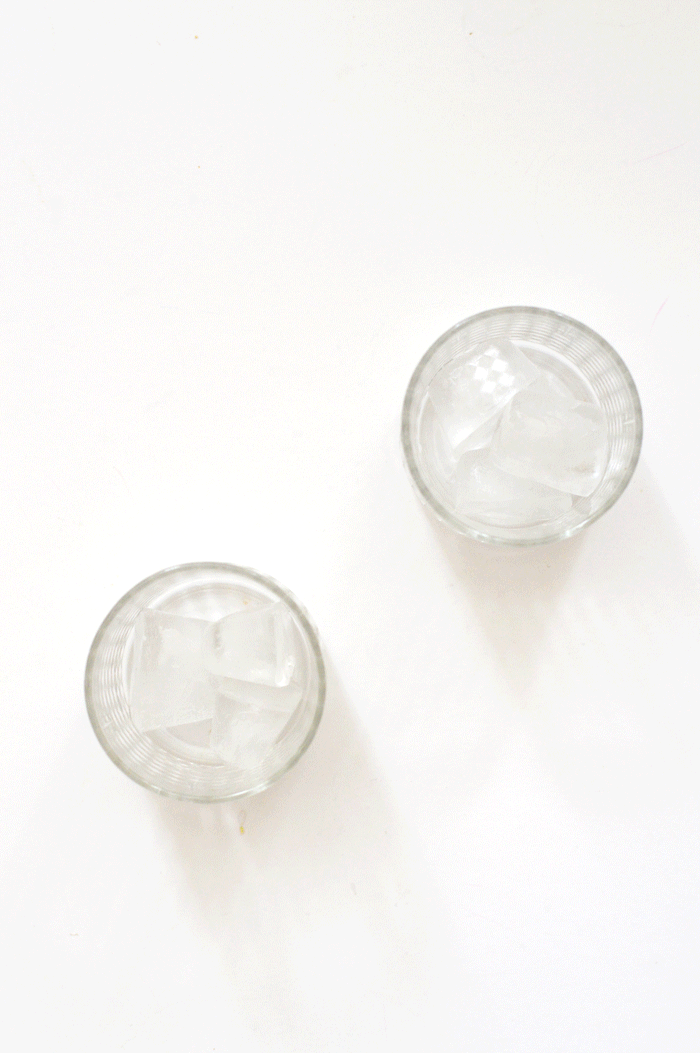
1. Plan your GIF: This might sound silly but I list out the movement I want my GIF to take on so that when I’m taking the photos that will create the GIF, I know exactly which shots I need. You don’t want to get to the editing process just to realize you’re one picture short. So far, I’ve used GIFs in my recipe posts, it was fantastic to show off the layers that went into my slow cooker lasagna since I wouldn’t have gotten that shot from another angle.
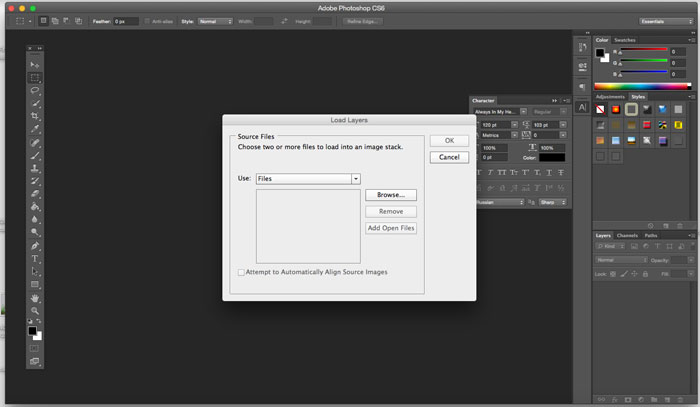
2. Open your photos in Photoshop: Once you’ve edited your photos, place them in order you want to appear and in a separate file. Go to Photoshop and then File > Scripts > Load Files Into Stack. Then click on Browse and select the folder that you put the images in.

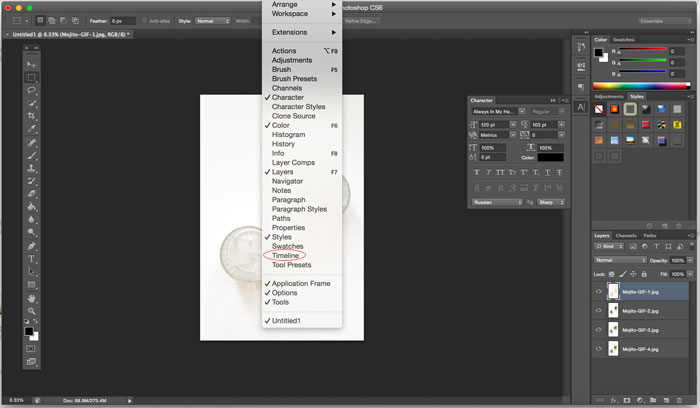
3. Create a timeline: Make sure that each layer is separate and then go to Window > Timeline.
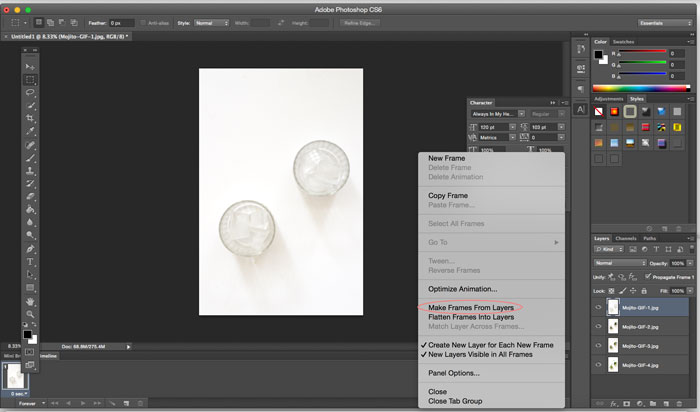
4. Once the Timeline is open: Right click on the three small bars that are located at the right side of the timeline pop-up. Click on “Make Frames from Layers.”

5. Set the speed: Click on the time under each image and select “1.0,” that’s my go-to time setting.
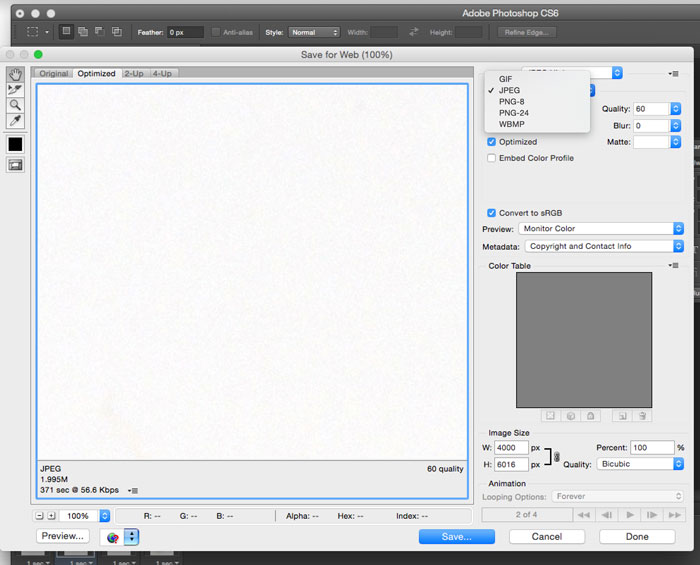
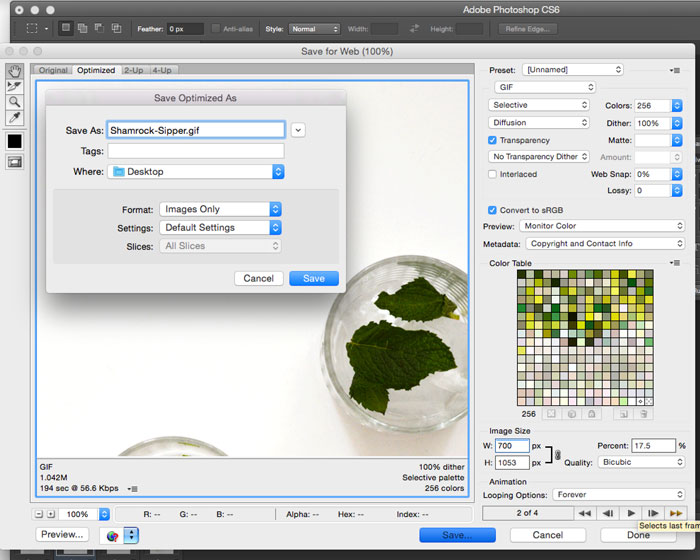
6. Save your GIF: Go to File > Save for Web and select “GIF” from the drop down menu 
7.TA-DA!!
Is there a blog/digital how-to you’d like to see? Let me know!
* * *
Let’s Chat!
Twitter | Pinterest | Instagram | Bloglovin’