If I had to pick a favorite social media platform, it’d have to be Instagram. Snapchat is catching up (👻: Lauren_Anne2989) but in the mornings before I roll out of bed, I always open Instagram first. At this point, it’s a reflex and I don’t even think about it.
Instagram gets kind of a bad rap as being everyone’s “highlight reel” and I’ll be the first to admit that my Instagram is definitely a highlights-only zone. Not pictured: Long hours at work followed by late night blogging, a messy workspace or even just plain stress. I acknowledge that my day-to-day doesn’t always look like my Instagram feed but I do love that my feed emphasizes a positive outlook.
When I brainstormed what I wanted my Instagram feed to look like, I thought about why I love Instagram so much. I realized it’s because when I come home simultaneously starving/ready to fall into bed, Instagram and its endless gorgeous photos make me smile. I hope my feed makes you smile!! My personal photography aesthetic is clean, crisp backgrounds that are typically white with bright, bold colors. At this point, I have my “recipe” of how I edit my photos down to a science so let’s walk through the editing process for my Instagram photos.
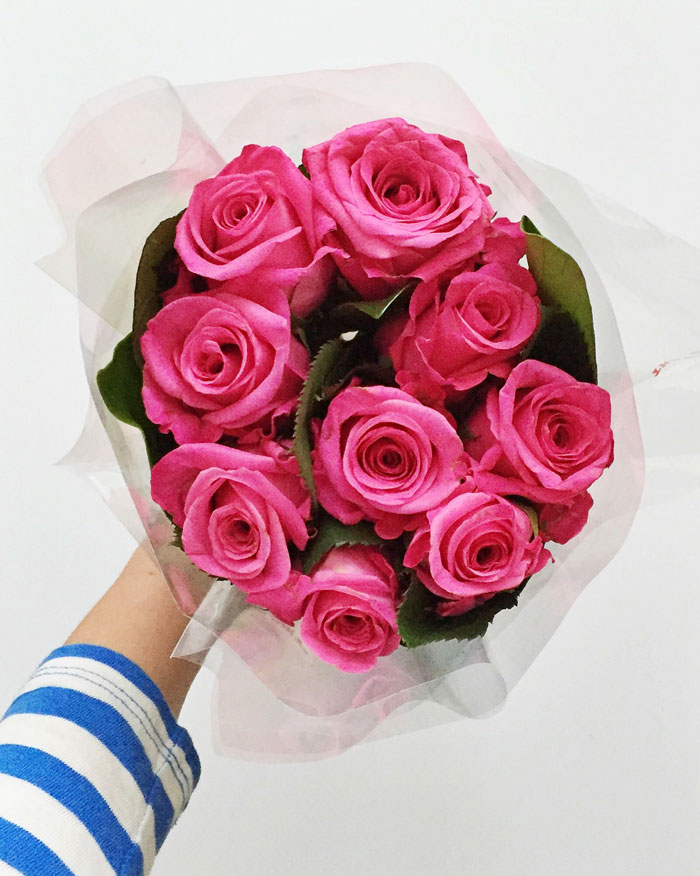
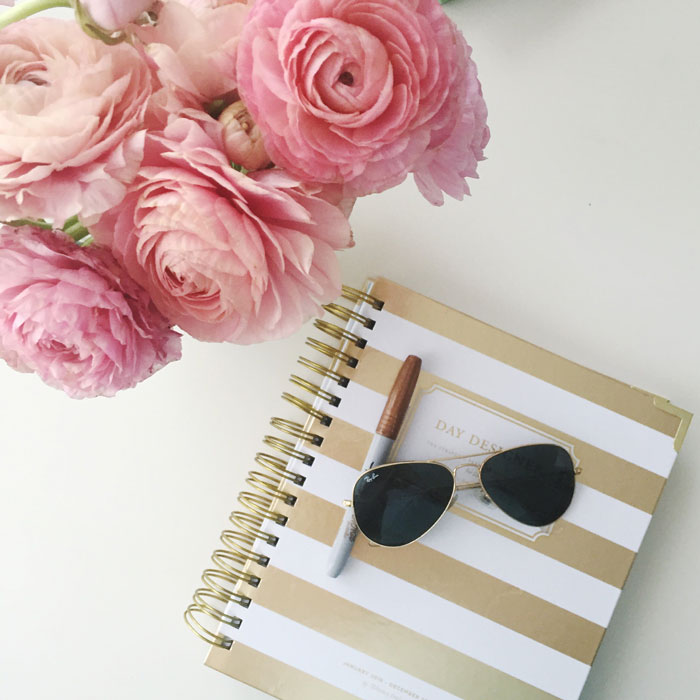
Let’s start with the “before” photo for the roses photo above:
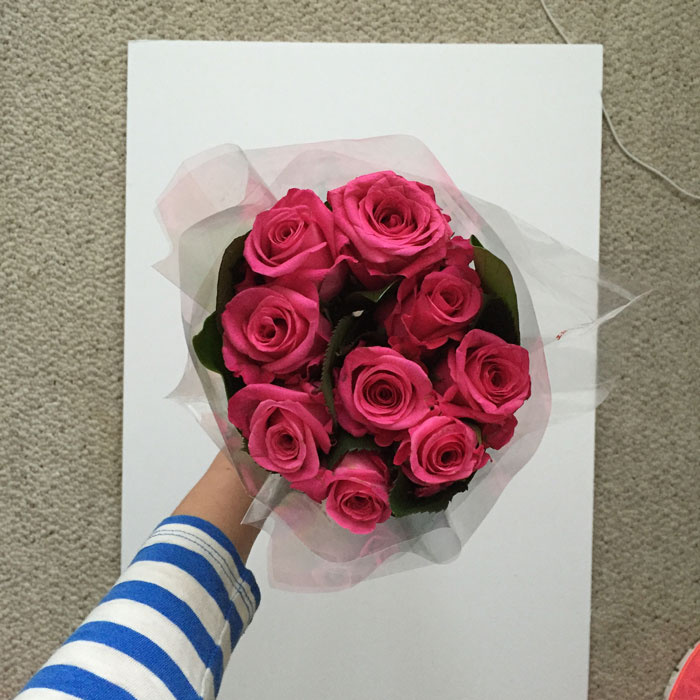
Let’s play a game of “What’s in the background?” There’s my laptop cord and in the bottom right, a peek of my gym shoes. I snapped this photo on my living room floor because the natural light was perfect. I got my shot and started editing it using A Color Story, the app from A Beautiful Mess.
Increase Brightness: My first step to edit photos for Instagram is increase the brightness of the photo. Typically, I increase the brightness until the white background appears to be pure white. You can see in this before shot, it looks a bit on the gray side. Quick note: This is a poster board that I picked up at Jo-Ann Fabrics months ago, super cheap and it makes an awesome background. Okay so up the brightness until the white looks truly white and/or the picture doesn’t become pixelated or it looks fuzzy.
Tweak the Contrast: This is where I try to be as delicate as I can, I only want to increase the contrast a smidge. Otherwise, my photo looks too sharp and hard and it’s just not my aesthetic/taste. You just want to increase the contrast enough to create some definition/texture.
Make it Colorful: To really make those bright colors I love so much POP, I increase the saturation to balance out the brightness. Increasing the brightness does wonders for white backgrounds but it does tend to wash some colors out and I want that colors to be as bold and happy as I can!
I’ve used this “recipe” for all the photos below (in addition to cropping out details like the edge of my dining table) so please comment below if you have any questions about my editing process!
It’s been awhile since I used a filter (I think the IG ones wash out photos) but A Color Story‘s filters are just TOO GOOD! My favorites are (in no particular order)
- Everyday (Under “Essentials)
- Disco Ball (Under “Good Vibes”)
- Palm Springs (Under “Good Vibes”)
- Magic Hour (Under “Good Vibes”)
- Summer Day (Under “Blush”)
- Blue Skies (Under “Chroma”)
- Tulip (Under “Fresh”)
- Pool Party (Under “Airy”)
When you apply a filter in A Color Story, it automatically applies it at the max so I typically bring it down to about 25%-35%.
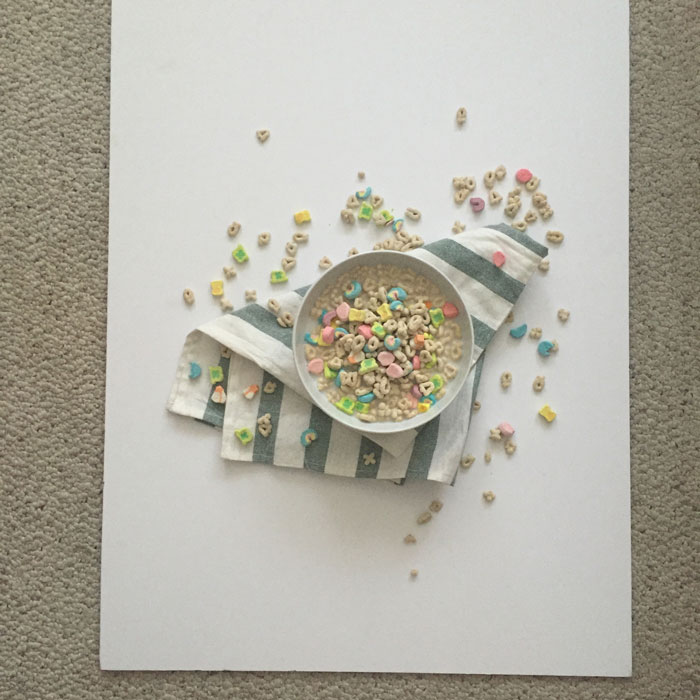
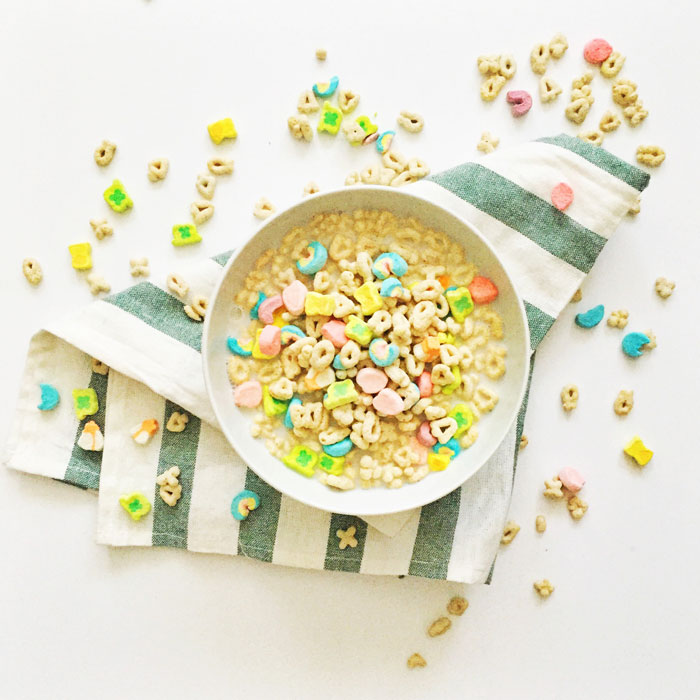
Back to the before and after shots.
You remember my Lucky Charms Overnight Oats post?

Do you have a favorite IG feed I should check out? Let me know!
* * *
Let’s Chat!
Twitter | Pinterest | Instagram | Bloglovin’


I love this! I just added you on Snap btw.
Love this, I’m definitely going to snag a poster board to start taking my photos in front of (I’ve been brainstorming how to get a pure white background forever and short of painting a wall in my house I just couldn’t come up with anything!)
xoxo, SS
The Southern Stylista