Living in a studio, I have to get creative with maximizing my space. I’m lucky to have ample storage for my clothes with a walk in closet and a hall closet. Priorities, people. While storage was fairly under control, I had a couple of spacing issues.
My sitting room area consisted of my loveseat, a wicker side table that doubled as my bar cart and another wicker coffee table to hold my television. I loved my couch but the tables were kind of low and the space looked like it needed a focal point to take up some of the empty space. After some serious brainstorming, I came upon a great idea: a vintage dresser!
I love antiques and quickly fell head over heels for the idea of a vintage dresser with a tilting mirror. After perusing Craig’s List, I decided the options in my New York hometown were significantly cheaper than the search results in the DC area. I had a conference call with my mother, who also loves antiques, and she launched her mission. After a couple of misses, she found a perfect dresser.
Most of the furniture in my studio is cream so I wanted to paint the dresser a vibrant color. We took a coral pillow case to Home Depot and they created a paint to match!
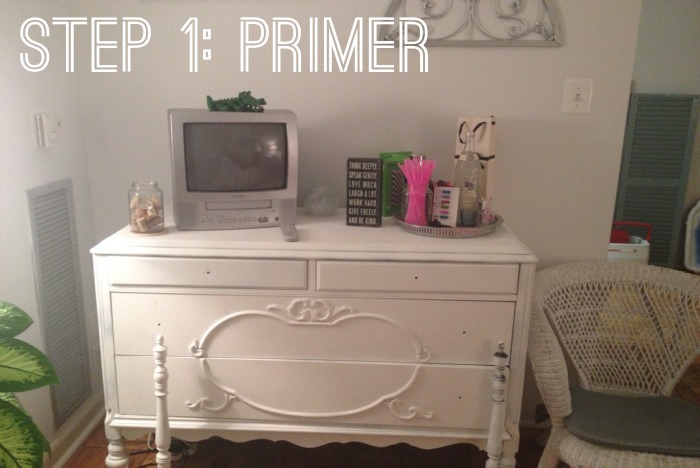 Step 1 was applying a primer. Since my parents applied the primer in New York before they came down for the Fourth, I couldn’t snag a before picture. Let the primer settle for about 24 hours.
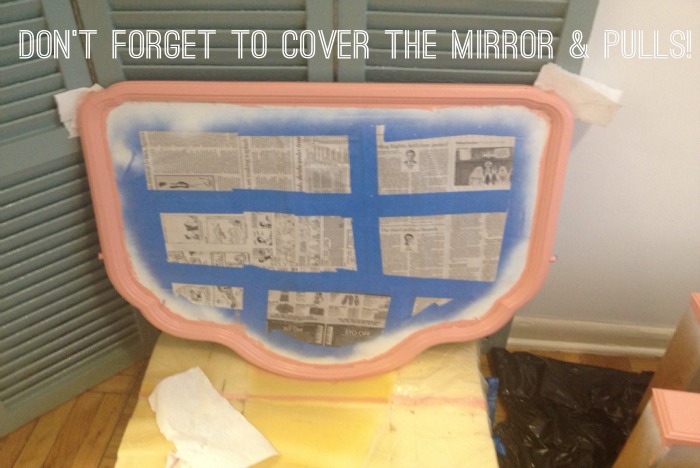 Any area you do not want covered in paint should be taped using painter’s tape. I swear by painter’s tape, especially for edging. Painting can be a rather nerve wracking process but painter’s tape eases my anxieties. For this project, we covered the mirror completely as well as the small pulls on the mirror. We completely removed the drawer knobs from the dresser.
 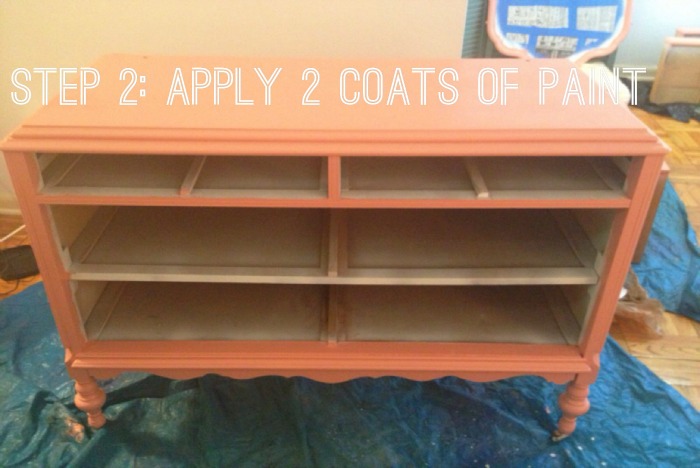 Take your time with painting, you want even coats of paint or else you could get bubbles. We put down old tarps, which I promptly threw away after this project. Each layer should have at least 12-24 hours to thoroughly dry. That might seem excessive but you wouldn’t want to risk ruining your work, right? The final result is worth it : )
Speaking of which…
Ta-da! My dresser now fits my bar cart, a vase and my television (which I turn on about 4 times a week). For my space, a dresser was a perfect fit. The mirror gives the illusion of more space, I gained additional storage with the dresser drawers, I’m stashing my spare table cloths, party essentials and extra kitchen items in there.
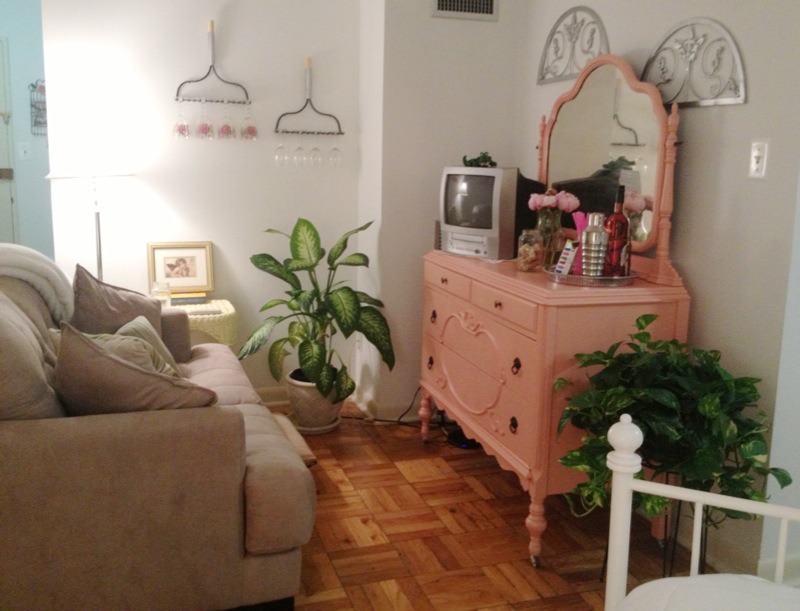 My sitting room area is complete! Now, on to my kitchen and gallery wall projects…
* * *
Say hello!
Twitter | Pinterest | Instagram | Bloglovin’ | Facebook


Wow the final product and room set up looks fantastic! Bravo!
Thanks, I was so excited by how it all turned out!
OMG it looks absolutely adorable! I love that shade of pink you picked & what an adorable idea to have a dresser in the living room 🙂