Sharing my experience in this ImPRESS Press-On Nails Review plus tips for application and removal!
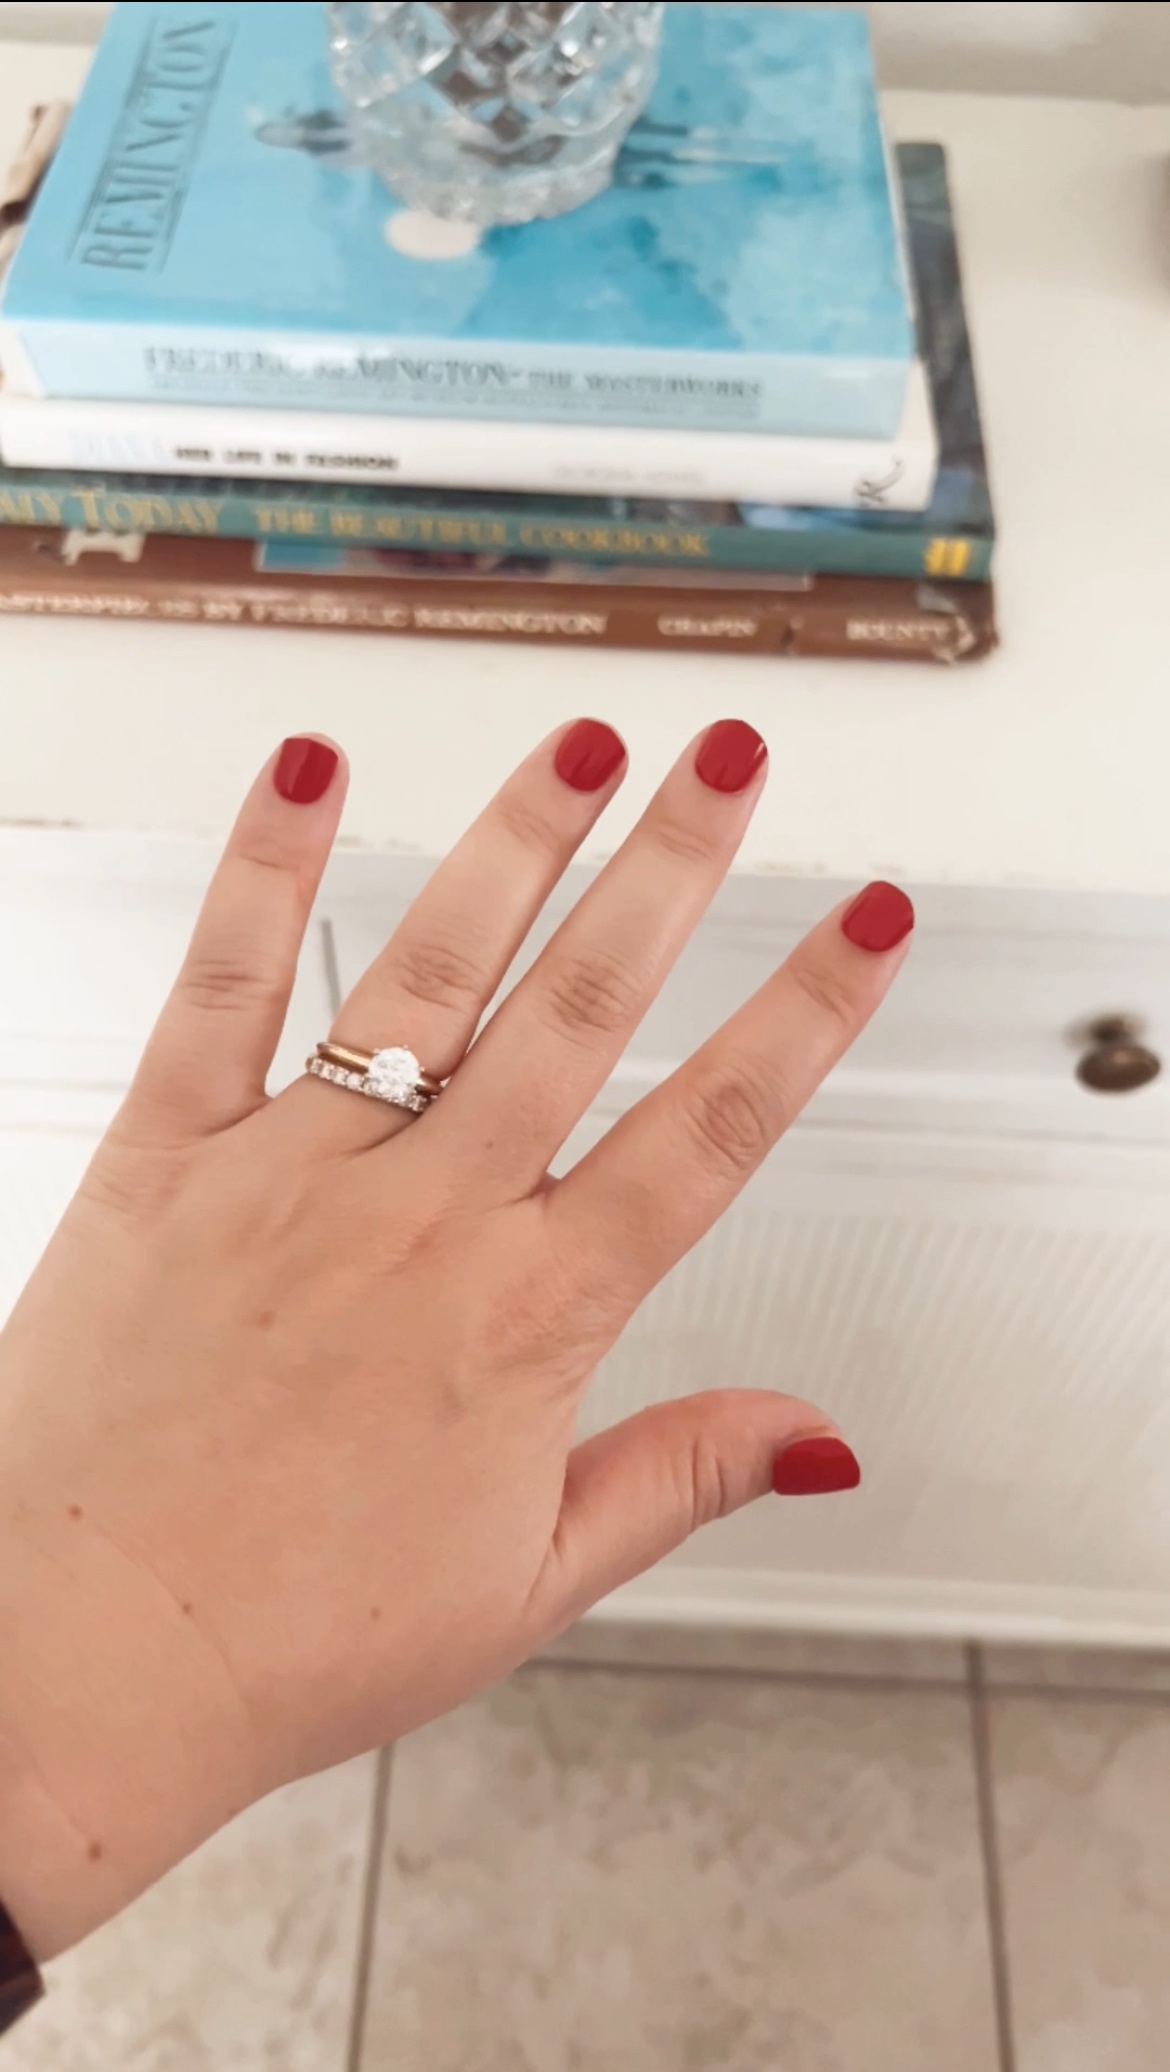
My nails and I have been on quite the emotional journey over the last few years. I’d get pedicures pretty regularly during sandal season and as wintertime treats. Every once in awhile, I would pop in to the nail salon and get a manicure for the professional shaping and buffing. I would always get a regular mani/pedi because I liked to change colors and it was easier to do touch-ups at home.
Then I started exploring gel and dip/SNS manicures after getting engaged. I mean, it seemed like people were suddenly staring at my hands and I wanted them to look their best for as long as possible!
I did gel manicures exclusively for about a year with one dip manicure sprinkled in there when I was on vacation. Because of the consistency, I never really looked at how my nails were faring underneath the gel until one day post-wedding, I decided to take a break and let my hands breathe.
Turns out, all the gel had done a number on my digits. My fingernails were brittle, oddly sharp, and the tips were nearly see-through. I was horrified.
I should note quickly this was just my own personal experience and I have friends who love their gel manicures. But if this happened to you, I’m right there with you, friend.
I limited my nail polish use and went back to my regular manicures. I knew I would not go back to gel but I will say I did miss how long a gel manicure would last and how I didn’t have to worry for weeks about my manicure looking less than perfect.
There had to be a solution for no-fuss nails that would last several weeks and would keep my natural nails healthy and happy.
ImPRESS Press-On Nails Review
Turns out press-on nails were the answer to my prayers. After my friend Heather raved about hers, I decided to give them a whirl.
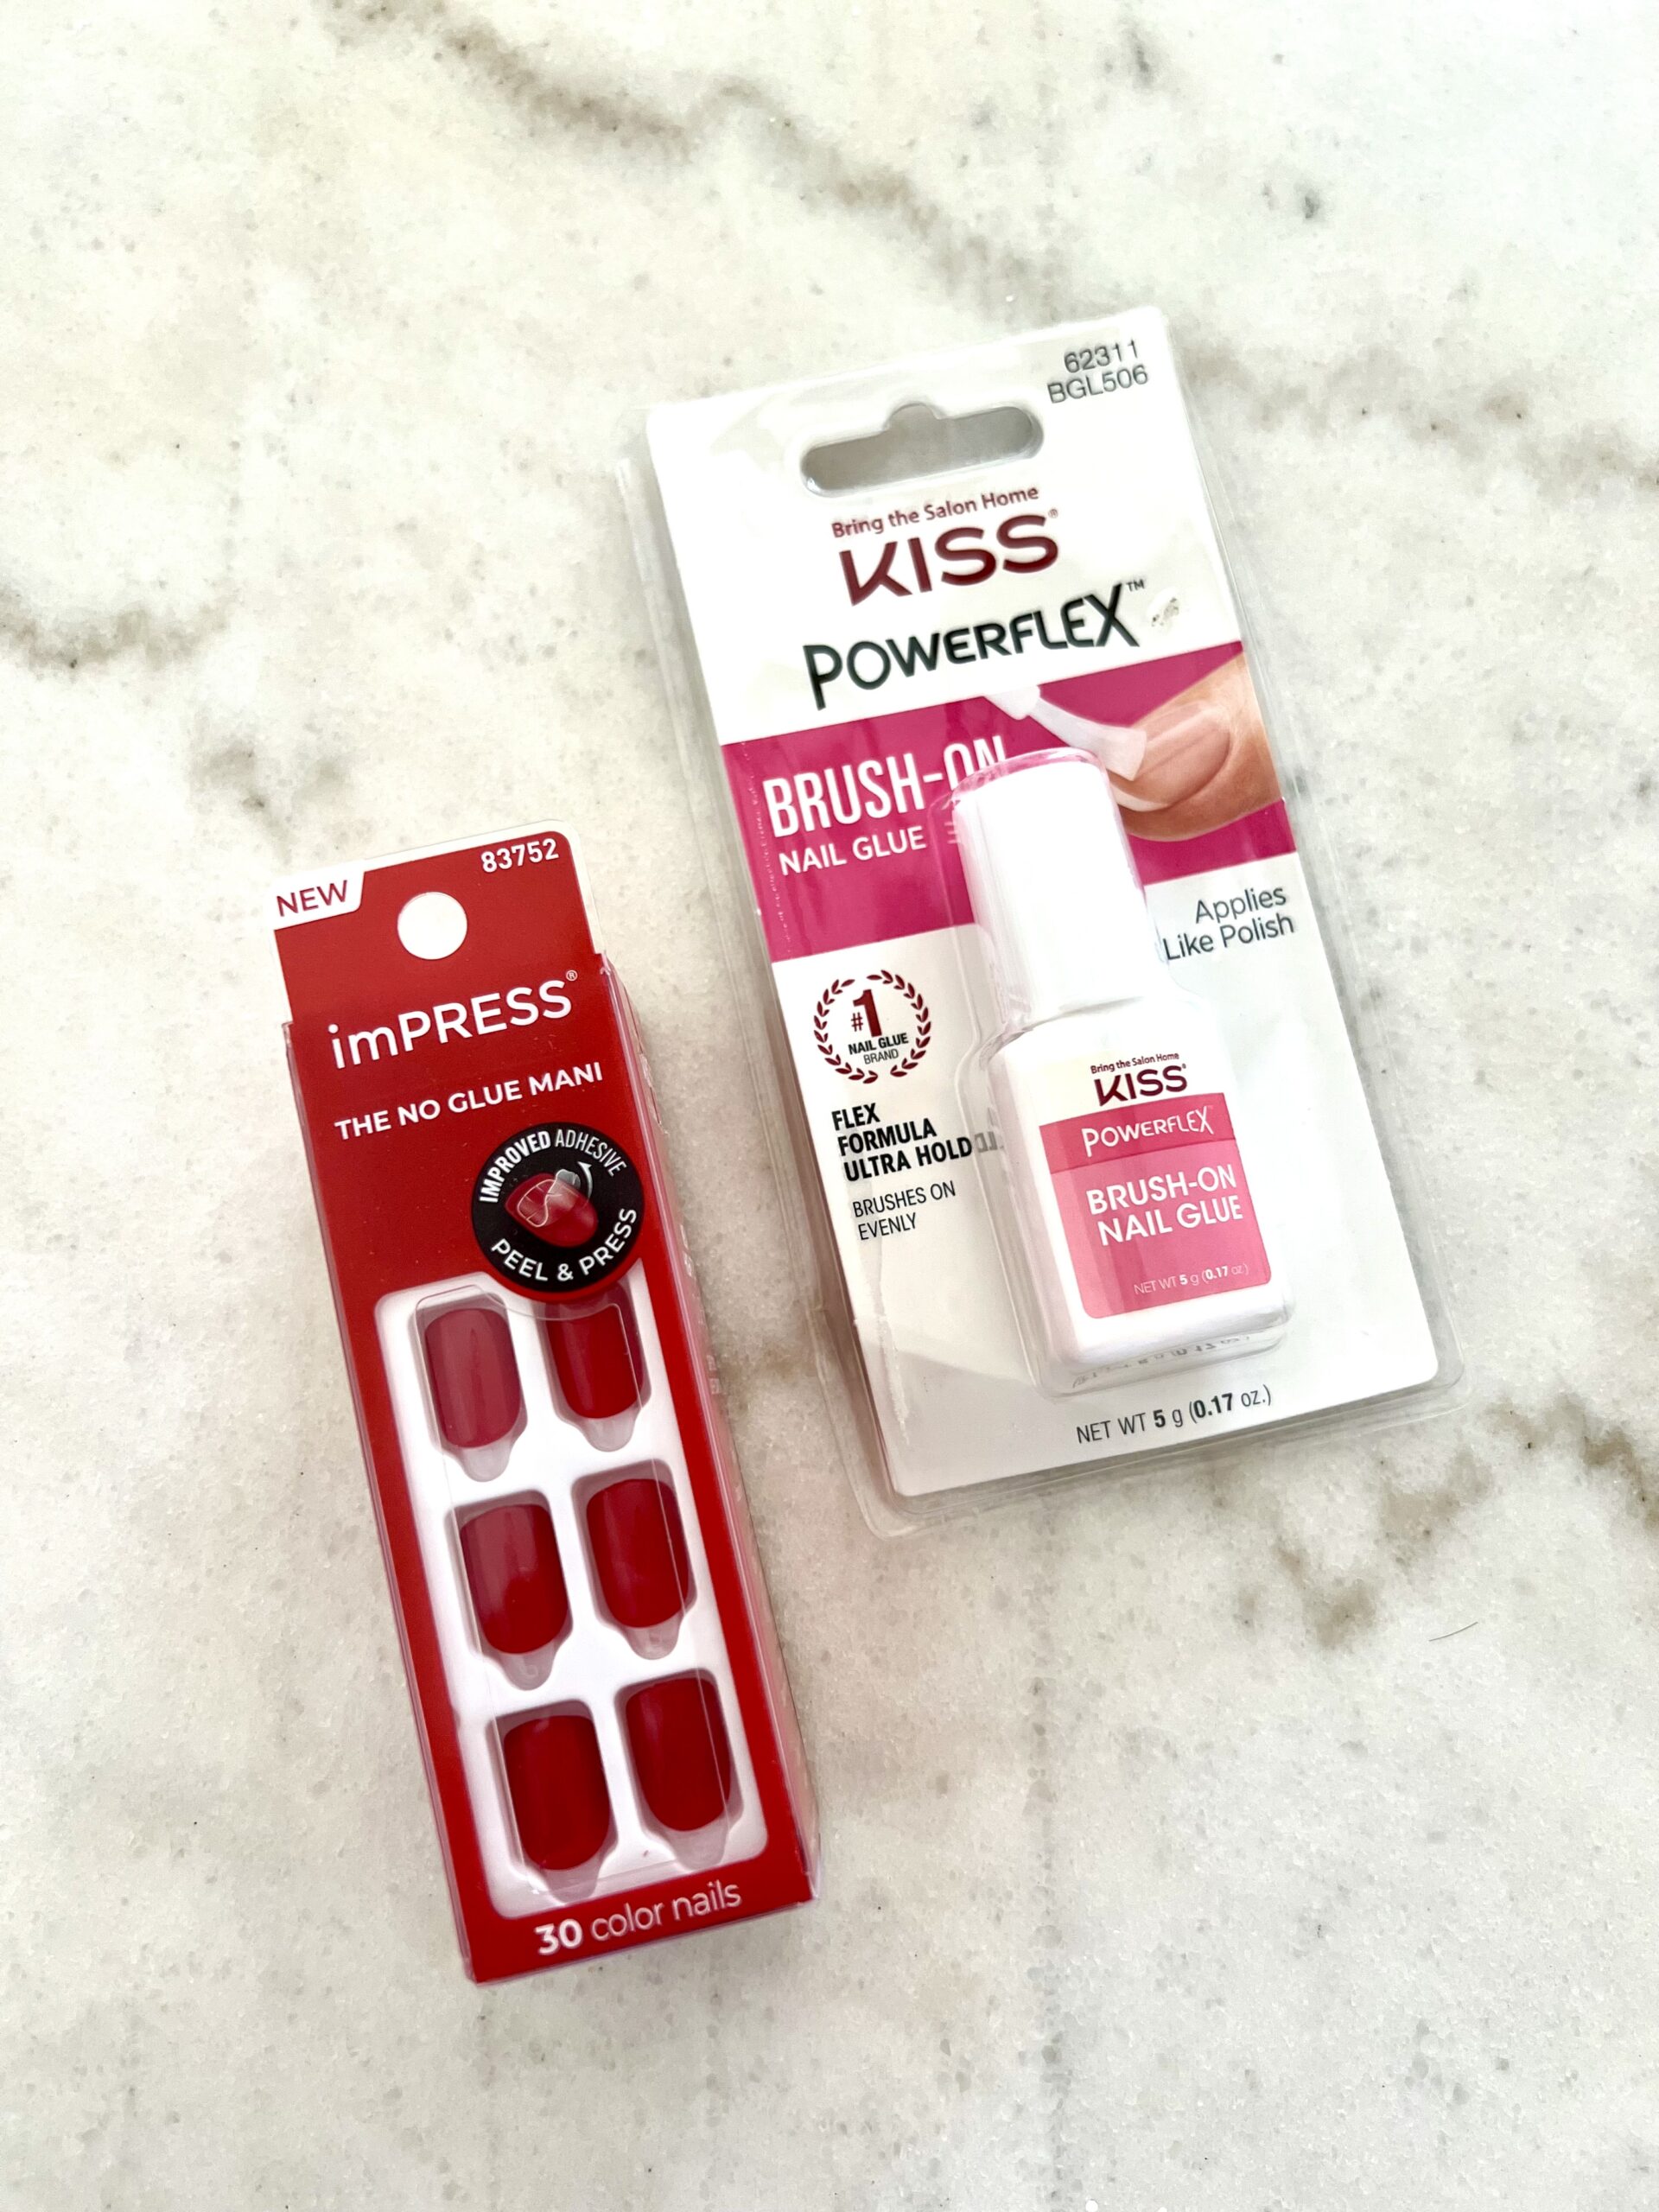
I ordered my ImPRESS nails from Amazon along with the brush-on nail glue at Heather’s recommendation. The press-on nails I selected are named “Reddy Or Not” in the short, squoval size. Don’t worry too much about the short, squoval size—we’ll chat about that in a minute! The $8 set includes a prep pad, 30 nails, a manicure stick, and a mini file along with instructions.
The “Reddy Or Not” color is perfect for year-round if you are someone who, like me, enjoys a good red manicure. It reminds me of my favorite OPI red, Big Apple Red. And it’s absolutely a fantastic shade for the holiday season!
The instructions were very easy to follow and prep and application took around 15 minutes. Honestly, the “hardest” part was figuring out which size nail was the right one. Now that I’ve done this several times, the application time is definitely less than 15 minutes these days. I loved not having to wait forever for the polish to dry and worry about bumping your nails and having to re-paint.
These press-on nails cost significantly less than a manicure in a salon and each application lasts about 2 weeks. Towards the end of the two weeks, I may have had to reapply one or two of the nails as they started to pull away from my natural nail but overall they really stay in place!
I was super impressed (no pun intended) at how great the press-on nails looked. They looked like I had gotten them done at a salon! I worried they would look fake but that was not the case at all.
After two weeks, it was time for the moment of truth. It was time to remove them. Lo and behold, the press-ons came off easily and my nails looked healthy! There was a little bit of leftover glue after removal but that really didn’t bother me, it just took a little extra time to remove.
How To Apply Press-On Nails
The ImPRESS set comes with a prep pad, which I used the first time. It’s not really necessary though and I typically just do a thorough handwashing before I sit down to apply. You’ll also want to clip your nails short so they don’t peek out from underneath the press-ons.
I usually spread the press-ons on our dining table or kitchen counter, wherever I’m sitting down to apply. I’ll do a “dry run” of placing each nail on top of mine to make sure I’ve selected the appropriate size. From there, I’ll arrange them so I can easily go down the line for each nail.
Brush the nail glue on your nail, you really just need one layer. Align the fake nail up with your cuticle (tab facing the cuticle) and then press on gently but firmly starting with the cuticle and moving downward. I typically apply pressure for about 15 seconds for each nail. Leave your thumbs for last!
I typically will then give the nails about 2 minutes to set. I’ll also avoid any movements that put pressure on the nails (i.e. opening a can of Diet Coke) for an hour but that’s really more out of an abundance of caution. Once they’re in place, they’re pretty much good to go!
Once they’re set, I then will use regular nail clippers to get them to the length I prefer.
How To Remove Press-On Nails
You’ll know it’s time to remove because you’ll see the press-on nails start to gently lift up from your natural nails or you’ll see your natural nails peeking out. This usually happens to me around the 2-week mark.
I let my nails soak in a bowl with soap to loosen the glue, just like you would in a nail salon. The set will come with a small wooden stick to help provide leverage to separate the press-on nail from your nail. This doesn’t hurt at all and I haven’t had any impact on my natural nails.
There might be some leftover glue after removal (usually toward the bottom of your nail bed). Just use your regular nail polish remover to get rid of it.
A Few Tips From My Experience
After doing several rounds of press-ons, I’m absolutely a convert. I will say, as someone who never wore fake nails, it did take a day or two to adjust and get used to them when I first tried them out. If you are also new to this game, here are a few tips:
- Avoid running your hands through your hair. I never realized how often I do this until I started wearing these nails. The first few days, I felt like I was constantly untangling my hair from my nails. My right pointer finger was the biggest culprit of this. You’ll loosen your nails and, in my case, lose several strands of hair. So save yourself from my mistake and kick this habit!
- There will be glue clumps underneath your nail. It’s inevitable the glue will ball up and hang out underneath your nail tip. They’re easy to remove without affecting the nail so just be prepared for that.
After reading my press-on nails review, are you going to try them out for yourself?!
I love pressons, i will try that color. For another tip coat with clear polish , or gel top clear/ uv light
Thanks, Lenn! I love a good red nail color.
Why are you using nail glue? The whole point is that you don’t need adhesive other than what’s on the nail itself. I find they last two weeks without applying glue first.
I’m glad that works for you! I’ve found using the nail glue is what works best for me.